
How Long Does a Pond Pump Need to Be on Each Day?
A pond pump and a filter are necessary to maintain pond health. A well-maintained pond adds value to a home, and even though a large pond with fish requires more maintenance than a small pond, it is worth the extra effort, providing movement, color and a dramatic landscape element. A pond’s pump should run 24 hours each day to ensure the pond’s water circulates through the filter to keep the water clear.

Pump Function
A pond pump may be submerged in the pond’s water or sit outside the pond, depending on the pump type, but both types work in the same way. The pump uses spinning blades, known as impellers, to pull pond water through a screenlike intake and expel the water through an outlet pipe. Generally, a large pond has an external pump and a smaller pond or water garden has a submersible pump. Any kind of pump requires regular maintenance of its intake filter and screen to prevent clogging.

Pump Size
Before buying a pond pump, calculate your pond’s water capacity to determine the size of pump required to circulate all of the pond’s water through the pump every one to two hours. Formulas can help you determine your pond’s water capacity in gallons from pond measurements taken in feet. The formula for a rectangular pond is length x width x depth x 7.48 = gallons. For a circular pond, the formula is radius x radius x 3.14 x average depth x 7.48 = gallons. The formula for an irregularly shaped pond requires dividing the pond into easier-to-calculate shapes, figuring the water capacity in gallons for each of those shapes and then multiplying the total sum of those gallons by 231 instead of 7.48.

Operating Cost
A pond that has a pump or other electric equipment requires electricity, and so it will increase your monthly electric cost. Some pumps cost less to operate than other pumps. Reduce the cost of pump operation by using a pump that moves the necessary amount of pond water while using the least amount watts; a watt is a measurement of electrical usage. Calculate the cost of operating a pump by using this formula: Divide the watts by 1,000, and then multiply that figure by 24 hours, the number of days per operation and electricity cost. An example is: 300 watts/1000 x 24 hours x 30 days x 0.08 for electricity cost = $17.28 as the cost to run the pump for 30 days.

Other Considerations
Mosquitoes can be a problem when a pond is in the landscape, but mosquitoes lay eggs in only stagnant water. A pump can keep the pond water moving, deterring mosquitoes from laying eggs in the water. Even a small amount of moving water can prevent mosquitoes from laying eggs. So if a pump is not feasible, add a fountain bubbler to keep water moving.

How Many Watts Would a 2.5 HP Pump Use?
A pump helps circulate and filter the water in a pool. A pump’s horsepower determines how quickly the pump can process all the water. The goal is for the pump to sufficiently filter all the water in an 8 to 10 hour period, according to Aquascapes. Depending on the size and volume of your pool, you will need more or less horsepower to filter the water in that ideal time frame. Horsepower can be converted to watts, giving you a guesstimate of what your energy costs might be to run your pump.
Math Conversions
One horsepower is equal to 745.7 watts. When you multiply 745.7 watts by 2.5 hp, you get 1,864.25 watts. Energy costs are calculated in kilowatt-hours, and to get kilowatt-hours, you multiply watts by hours and divide by 1,000. So, if you run your pool pump for 8 hours in one day, 1,864.25 multiplied by 8 and divided by 1,000 equals 14.9 kilowatt-hours. If you run your pump every day for an average of 30 days per month — 30 multiplied by 14.9 — your pump uses 447 kilowatt-hours in a month.
Outdoor Water Garden Ponds
Outdoor Water Garden Ponds
Meyer Aquascapes installs outdoor water garden ponds, water features, water fountains and ponds. When we install a new water garden, we take into a wide variety of factors. Our water feature experts share with us some of their water garden ideas, designs, and the impact these decisions have once the pond has been installed. Many of our customers prefer to go the route of installing their own DIY outdoor water garden pond.
If you need help installing your outdoor water garden pond, give us a ring. Here at Meyer Aquascapes we love installing custom water gardens!
Outdoor Water Feature Ideas
Bringing family together is usually one of the first things people think of when they think of an outdoor water garden pond. Family is a good thing to think about, because everyone will want to see the paradise in your backyard! Water gardens are great conversation starters and breaking the ice with visitors.

Water Feature Design Factors
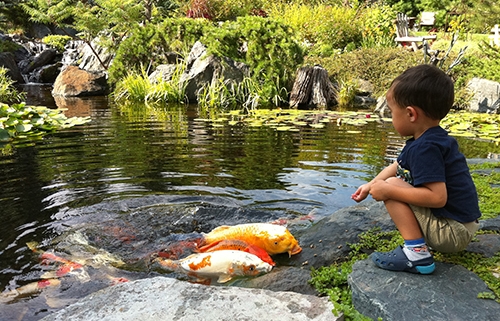
Children love playing in outdoor water garden ponds, and this keeps them out of the mud! When we design water garden ponds, we think of who is going to be seeing the pond. Are children going to be around? How deep should it be? What kinds of rocks would work best?

Aquascapes Outdoor Pond Ideas
Why go to the park when your backyard is just as good? A water garden adds serenity to a backyard, or front yard for that matter! We tried to capture the beauty in this picture, but we just couldn’t. Pictures and words just can’t describe this beautiful outdoor water feature design.

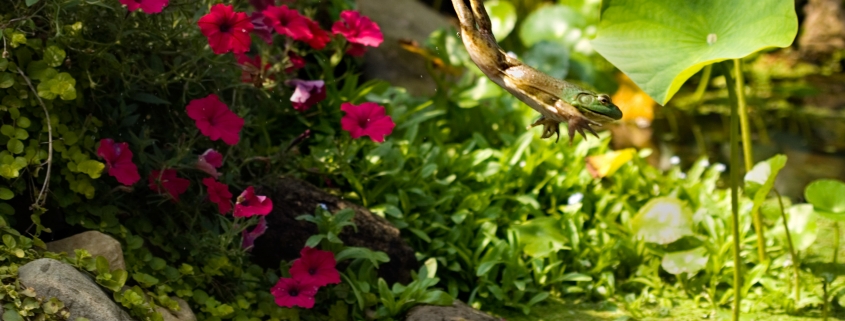
Outdoor Water Garden Pond Fish
Outdoor water garden pond design also includes what kinds of fish we determine to be best for the water garden’s ecosystem. We account for the water garden temperature, climate, tree shade, and proximity to other features. Some outdoor pond fish can be kept together, and some pond fish can be natural predators to other specific water garden fish.

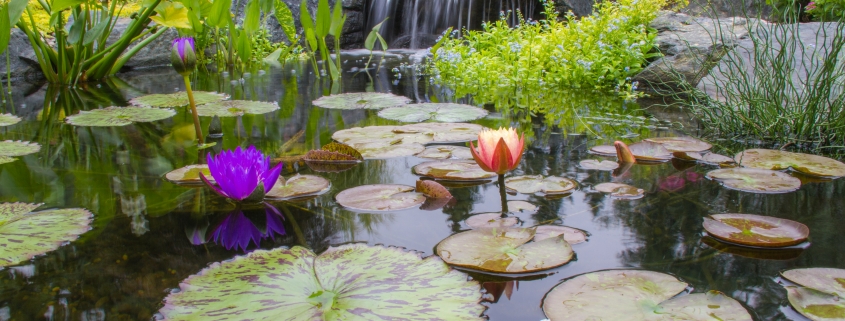
Pond Water Lilys
Water lilys for outdoor water garden ponds come in a variety of colors, shapes and sizes. The perfect water lily depends on the water feature, design, and surrounding pond fish. When we design an outdoor water feature pond, we take into account several factors to arrive at a decision on which water lily will thrive in the water garden.

Outdoor Water Garden Pond Vegetation
Vegetation is important when it comes to outdoor water garden design. When plants are added to a water garden, they assist in balancing the outdoor water garden’s natural ecosystem. Adding in beneficial bacteria helps keep the water clear of gunk and debris.

Water Feature Placement
Kicking back and enjoying your water feature is one of the most important things we can help do! When we design an outdoor water garden pond, we think about the placement. We want you to be able to enjoy your Aquascapes water garden pond as much as possible. Typically our customers enjoy their water garden pond next to their deck, patio, or porch.

Outdoor Water Garden Pond Front or Back Yard?
Choosing between the back yard and front yard is one of the most difficult decisions for any outdoor water garden pond installation. When we install a water garden, we help you consider whether you would prefer the front, or back yard. If your water garden is in the front of your home, your visitors will see it right away, but backyard water features are typically easier to enjoy due to the proximity of nearby seating areas.


