[av_heading heading=’How to Install a Pond Pump’ tag=’h1′ link_apply=” link=’manually,http://’ link_target=” style=’blockquote modern-quote modern-centered’ size=” subheading_active=” subheading_size=’15’ margin=” padding=’10’ color=” custom_font=” custom_class=” admin_preview_bg=” av-desktop-hide=” av-medium-hide=” av-small-hide=” av-mini-hide=” av-medium-font-size-title=” av-small-font-size-title=” av-mini-font-size-title=” av-medium-font-size=” av-small-font-size=” av-mini-font-size=”][/av_heading]
[av_hr class=’short’ height=’50’ shadow=’no-shadow’ position=’center’ custom_border=’av-border-thin’ custom_width=’50px’ custom_border_color=” custom_margin_top=’30px’ custom_margin_bottom=’30px’ icon_select=’yes’ custom_icon_color=” icon=’ue808′ font=’entypo-fontello’ av_uid=’av-1g8xv87′ admin_preview_bg=”]
[av_one_half first min_height=” vertical_alignment=” space=” custom_margin=” margin=’0px’ row_boxshadow=” row_boxshadow_color=” row_boxshadow_width=’10’ link=” linktarget=” link_hover=” title_attr=” alt_attr=” padding=’0px’ highlight=” highlight_size=” border=” border_color=” radius=’0px’ column_boxshadow=” column_boxshadow_color=” column_boxshadow_width=’10’ background=’bg_color’ background_color=” background_gradient_color1=” background_gradient_color2=” background_gradient_direction=’vertical’ src=” background_position=’top left’ background_repeat=’no-repeat’ animation=” mobile_breaking=” mobile_display=” av_uid=’av-1o6zni7′]
[av_image src=’https://aquascapes.com/wp-content/uploads/2011/07/PU01124-63_TW2Pump.jpg’ attachment=’6107′ attachment_size=’full’ align=’center’ styling=” hover=” link=’product_cat,314′ target=” caption=” font_size=” appearance=” overlay_opacity=’0.4′ overlay_color=’#000000′ overlay_text_color=’#ffffff’ copyright=” animation=’no-animation’ av_uid=’av-19ndwuv’ custom_class=” admin_preview_bg=”][/av_image]
[/av_one_half][av_one_half min_height=” vertical_alignment=’av-align-top’ space=” margin=’0px’ margin_sync=’true’ row_boxshadow_color=” row_boxshadow_width=’10’ link=” linktarget=” link_hover=” title_attr=” alt_attr=” padding=’0px’ padding_sync=’true’ highlight_size=’1.1′ border=’8′ border_color=’#ffffff’ radius=’0px’ radius_sync=’true’ column_boxshadow_color=” column_boxshadow_width=’10’ background=’bg_color’ background_color=’#ffffff’ background_gradient_color1=” background_gradient_color2=” background_gradient_direction=’vertical’ src=” attachment=” attachment_size=” background_position=’top left’ background_repeat=’no-repeat’ animation=” mobile_breaking=” mobile_display=” av_uid=’av-1a07vmn’ custom_class=”]
[av_textblock size=” font_color=’custom’ color=’#3a8ee8′ av-medium-font-size=” av-small-font-size=” av-mini-font-size=” av_uid=’av-1c5tfxj’ custom_class=” admin_preview_bg=’rgb(255, 255, 255)’]
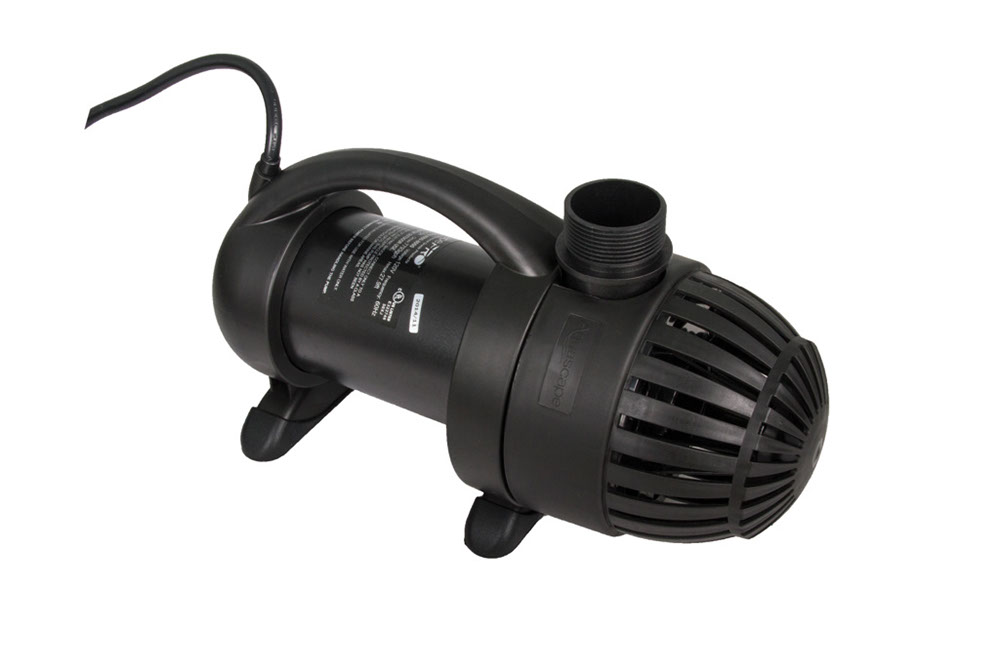
A pond pump is the driving force behind any water feature. The pump pushes water into and through your system, and if you ever plan on having anything that’s more than a puddle in your yard, you’ll need to know how to install one.
[/av_textblock]
[av_hr class=’invisible’ height=’50’ shadow=’no-shadow’ position=’center’ custom_border=’av-border-thin’ custom_width=’50px’ custom_border_color=” custom_margin_top=’30px’ custom_margin_bottom=’30px’ icon_select=’yes’ custom_icon_color=” icon=’ue808′ font=’entypo-fontello’ av_uid=’av-kzrhb820′ custom_class=” admin_preview_bg=”]
[av_textblock size=” font_color=” color=” av-medium-font-size=” av-small-font-size=” av-mini-font-size=” av_uid=’av-kzrh9aeb’ custom_class=” admin_preview_bg=”]
There are different kinds of pumps designed for different purposes, so knowing which type you need will make picking out the right one much easier. For this article we’re going to be discussing submersible (also called “in-pond”) pumps, as opposed to line or external/submersible fountain pumps, because those have their own specific application and should not be used instead of a high quality submersible model.
[/av_textblock]
[/av_one_half][av_hr class=’invisible’ height=’50’ shadow=’no-shadow’ position=’center’ custom_border=’av-border-thin’ custom_width=’50px’ custom_border_color=” custom_margin_top=’30px’ custom_margin_bottom=’30px’ icon_select=’yes’ custom_icon_color=” icon=’ue808′ font=’entypo-fontello’ av_uid=’av-kzrhb2yt’ custom_class=” admin_preview_bg=”]
[av_textblock size=” font_color=” color=” av-medium-font-size=” av-small-font-size=” av-mini-font-size=” av_uid=’av-kzrha32w’ custom_class=” admin_preview_bg=”]
Here’s what you’ll need:
[/av_textblock]
[av_toggle_container initial=’1′ mode=’accordion’ sort=” styling=’av-minimal-toggle’ colors=’custom’ font_color=” background_color=” border_color=” hover_colors=’custom’ hover_background_color=’#edae44′ hover_font_color=” colors_current=’custom’ font_color_current=’#ffffff’ background_current=’bg_gradient’ background_color_current=” background_gradient_current_color1=’#589de8′ background_gradient_current_color2=’#ffffff’ background_gradient_current_direction=’diagonal_tb’ av_uid=’av-kzrgl151′ custom_class=”]
[av_toggle title=’Pond pump with a long electrical cord ‘ tags=” av_uid=’av-5mvvmwv’]
at least as long as the distance from your power supply socket to where the pump’s going to be located in the pond. If you’re using a multi-outlet extension chord, make sure it’s heavy enough to carry whatever you throw on it and that all of its cords are rated for outdoor use. Covering any exposed or frayed parts will help keep your pets and kids safe around water. And if you plan on having more than one fountain, use a multi outlet cord so you don’t have to keep unplugging and replugging into new outlets every time you want to switch out equipment.
You will also want a pump suitable for the size of your pond and any adjustable nozzles or spray bars you plan on using with it. Be careful of pumps which claim to displace a lot of water but don’t have any adjustable nozzles or spray bars designed to fit them, as these are basically just large head pumps that will lose efficiency by moving too much air instead of water when pumping from a small opening. If you want to use an adjustable nozzle or spray bar, look for one rated for at least twice the amount of flow you need so that if necessary it can be turned down to half its maximum output.
[/av_toggle]
[av_toggle title=’Teflon tape’ tags=” av_uid=’av-59szwkf’]
get this at any hardware store and use it to wrap threaded fittings. It makes a good seal for the pump’s electrical cord.
[/av_toggle]
[av_toggle title=’A power strip ‘ tags=” av_uid=’av-503klmn’]
that can handle whatever you plan on plugging into it, and of course, GFCIs (Ground Fault Circuit Interrupters) if your outlet isn’t outdoor rated. A GFCI will also help keep children and animals safe around water by shutting down the system if there’s an unintentional difference between the amount of electric current entering or exiting through its hot and neutral wires.
[/av_toggle]
[av_toggle title=’Power drill ‘ tags=” av_uid=’av-4k0kjtr’]
with a bit at least as large as the largest bit used to attach your fountain head (or heads), something like a 3/4″ or 1″ drill bit is usually more than big enough even for pumps capable of handling multiple nozzles. You’ll also need a hole saw drill bit if you want to have a recirculating pump, which is basically just a submersible pump with its own reservoir instead of having the pond itself as the reservoir. In this case it’s better to use a smaller, adjustable nozzle or spray bar instead of a set-and-forget head that may not provide enough coverage for your entire area.
Don’t forget drill bits, screwdriver heads and other tools that may be needed to drill a hole through a solid object such as a decorative piece or rock that is to be put onto or into your pond floor so that each flexible section doesn’t have to cross over itself where they join together; i.e., you don’t want to run your power cord through this same area or it will eventually chafe the cord and short out at best, catch fire at worst. If you’re lucky enough to have a completely flat pond bottom with no rocks (or their seams) then you can probably use your current pump without any additional adaptors; otherwise, make sure whatever adaptor(s) you choose is compatible with your current equipment.
[/av_toggle]
[av_toggle title=’Rubber stopper ‘ tags=” av_uid=’av-3r6cv4v’]
that matches the size of whatever sized opening you’re using on your fountain head (or other equipment). When used in connection with an adjustable nozzle, this should be small enough to let water flow out but large enough so as not to allow any fish or frogs inside. Some people recommend placing this before you attach the pump to prevent any noxious odors or chemicals from getting into your pond.
-Rubber gaskets or another form of sealant that can be used around the outside ends of the adjustable nozzle, pump intake and/or pump output should it become necessary to reseal their connections after moving them around so as not to disturb the seal between two pieces of tubing where they meet inside. Any aquarium shop will sell this type of sealant in either sanded or unsanded form depending on what you’re using for flexible tubing. Generally, just enough goop should be used that when placed under pressure won’t squeeze out if any part isn’t completely airtight, while still allowing easy removal when you want to change things up again.
Rubber stoppers for sealing off the pump orifices if they didn’t come with screws to do so. Generally, you don’t want these as loose as possible but instead as tight as possible without pressing against any part of the end nozzle’s openings like the adjustable valve inside it. You can always tighten them later on if needed by applying a little more goop and then rotating them slightly clockwise to make them even tighter (if applicable) while screwing/unscrewing them at the same time until their rubber seals expand enough to create a good seal without deforming too much or creating air gaps.
[/av_toggle]
[av_toggle title=’Vinyl tubing ‘ tags=” av_uid=’av-3exay73’]
that’s long enough to provide an uninterrupted path from your pump to the fountain head(s) without kinking, nicking or biting through. A good place to get this is a pet store, where it will usually be sold in 50′ rolls with fittings designed for aquarium use.
Anchoring weights for use with your flexible tubing if it doesn’t already come pre-weighted; otherwise the tubing will float and not lay flat on the bottom of your pond. You can use whatever you like as long as it’s heavy enough; those sold for this purpose by some garden centers are usually too light unless you’re using very thick (0.75″ or more) tube which might work depending on how much water your pump displaces, but otherwise just look at what’s used in aquariums for this purpose since it’s often heavier than other weights.
Suction cups for attaching flexible tubing to rocks sticking up from the bottom of the pond so as not to let it fall over where it joins together if that is where your distance between two objects is 2′ 2″ or less apart. Generally, just one suction cup per tube section should suffice, but it’s better to have two just in case unless you are using extremely heavy tubing which should be strong enough on its own without plastic cups.
Suction cup anchors for attaching wire mesh net along rocks sticking up from the bottom of the pond so as not to let it fall over where it joins together if that is where your distance between two objects is more than 2′ 2″ apart. Generally, just one anchor per net section should suffice, but it’s better to have two just in case unless you are using extremely heavy flexible tubing which should be strong enough on its own without plastic cups or metal anchors. You will also need suction cup anchors for attaching any kind of decorative piece (i.e., log) along rocks sticking up from the bottom of your pond so as not to let them fall over where they join together if that is where your distance between two objects is more than 4′ apart. Generally, just one anchor per net section should suffice for this purpose since the suction cup will rest on top of the decorative piece where it joins the rock, but it’s better to have two just in case unless you are using extremely heavy or dense decorative pieces which should be strong enough on their own without plastic cups.
[/av_toggle]
[av_toggle title=’Pre-measured adaptor lengths ‘ tags=” av_uid=’av-2ty90tb’]
for between flexible tubing sections if they don’t come as a set and you need to splice them together so they will reach from one pump section to another. Generally, these can be cut with regular scissors or tin snips if they’re too long; otherwise measure both ends of the unconnected tubing section(s) and then select an adaptor length that is closest to the average distance and has a few inches more than what your measurements came out as.
Additional flexible tubing sections may be needed if your pump has a wide base and may not fit onto some rocks sticking up from the bottom of your pond so as not to let them fall over where they join together if that is where your distance between two objects is more than 2′ 2″ apart. Generally, these can be cut with regular scissors or tin snips if they’re too long; otherwise measure both ends of the unconnected tubing section(s) and then select an adaptor length that is closest to the average distance and has a few inches more than what your measurements came out as.
You will also want an adaptor set including a length of flexible tubing with both ends cut at 45° angles as well as an additional net section if your pump has a wide base and may not fit onto some rocks sticking up from the bottom of your pond so as not to let them fall over where they join together if that is where your distance between two objects is more than 2′ 2″ apart. Generally, these can be cut with regular scissors or tin snips if they’re too long; otherwise measure both ends of the unconnected tubing section(s) and select an adaptor length that is closest to the average distance and has a few inches more than what your measurements came out as.
[/av_toggle]
[av_toggle title=’A hose clamp or barb fitting ‘ tags=” av_uid=’av-2i05hen’]
depending on which type of connection you’re making between two pieces of tubing. Get these at any hardware store and put them around the outside of all connections so they don’t pull loose under pressure. Make sure you buy enough so each piece of tubing has one clamped around both ends plus one spare.
[/av_toggle]
[av_toggle title=’PVC primer and cement’ tags=” av_uid=’av-2a8g1en’]
or a glue that can bond to both tubing and fittings. Again, your local hardware store will have these. They’re not absolutely necessary but are very helpful especially if you need to change out any of the connections later on.
[/av_toggle]
[av_toggle title=’An adhesive sealant ‘ tags=” av_uid=’av-1jmlvdr’]
for use inside any connections leading into or out of the pump’s reservoir should it become necessary to reseal them after moving the pump around so as not to disturb the seal between two pieces of tubing where they meet inside, such as when you want to move one section up or down without disturbing the other section which would otherwise pull apart if moved too far from its original position. Any aquarium shop will sell this type of sealant in either sanded or unsanded form.
[/av_toggle]
[av_toggle title=’ A filter net ‘ tags=” av_uid=’av-z87oov’]
(also known as tulle) if you think there might be debris in the water you don’t want to clog up your pump or any equipment attached to it. Otherwise just use a pre-filter over the intake of the pump so as to prevent debris from entering its impeller, which if not protected will eventually corrode and need replacement.
Additional net sections if your pump has a wide base and may not fit on some rocks sticking up from the bottom of your pond so as not to let them fall over where they join together if that is where your distance between two objects is more than 4′ apart. Generally, these can be cut with regular scissors or tin snips if they’re too long; otherwise measure both ends of the unconnected tubing section(s) and then select an adaptor length that is closest to the average distance and has a few inches more than what your measurements came out as.
An adjustable nozzle or spray bar. If you’re using an external filter net (like tulle), this should be designed for that size of netting material. Otherwise, look for something that can provide at least 1/4″ droplets depending on the type of fish and plants in your pond, along with whatever other requirements you may have like reduced aeration or greater impact strength.
If applicable, make sure both ends (or all three ends if it has three nozzles) are compatible with whatever your current fountain head or other equipment is designed to accommodate
[/av_toggle]
[/av_toggle_container]
[av_one_full first min_height=” vertical_alignment=” space=” custom_margin=” margin=’0px’ link=” linktarget=” link_hover=” padding=’0px’ border=” border_color=” radius=’0px’ background=’bg_color’ background_color=” background_gradient_color1=” background_gradient_color2=” background_gradient_direction=’vertical’ src=” background_position=’top left’ background_repeat=’no-repeat’ animation=” mobile_breaking=” mobile_display=” av_uid=’av-10y8z8n’]
[av_textblock size=” font_color=” color=” av-medium-font-size=” av-small-font-size=” av-mini-font-size=” av_uid=’av-108iu6v’ custom_class=” admin_preview_bg=”]
Thanks for reading at Meyer Aquascapes! We hope you’ve enjoyed our post on garden pond design. Please leave a comment below if you liked it or have any questions. We’d love to hear from you! Thanks for stopping by!
[/av_textblock]
[/av_one_full]
[av_hr class=’short’ height=’50’ shadow=’no-shadow’ position=’center’ custom_border=’av-border-thin’ custom_width=’50px’ custom_border_color=” custom_margin_top=’30px’ custom_margin_bottom=’30px’ icon_select=’yes’ custom_icon_color=” icon=’ue808′ font=’entypo-fontello’ av_uid=’av-4bnqpz’ admin_preview_bg=”]
[av_heading heading=’How can we help?’ tag=’h1′ link_apply=” link=” link_target=” style=’blockquote modern-quote modern-centered’ size=” subheading_active=” subheading_size=’15’ margin=” padding=’10’ color=” custom_font=” custom_class=” admin_preview_bg=” av-desktop-hide=” av-medium-hide=” av-small-hide=” av-mini-hide=” av-medium-font-size-title=” av-small-font-size-title=” av-mini-font-size-title=” av-medium-font-size=” av-small-font-size=” av-mini-font-size=”][/av_heading]
[av_textblock size=” font_color=” color=” av-desktop-hide=” av-medium-hide=” av-small-hide=” av-mini-hide=” av-medium-font-size=” av-small-font-size=” av-mini-font-size=” av_uid=’av-334avi’]
[/av_textblock]