-
×
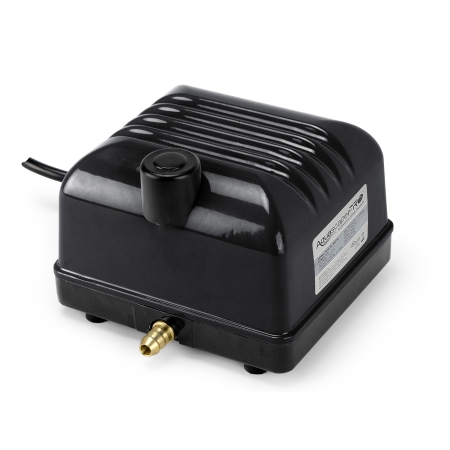 Aquascape Pro Air 20 Aeration Compressor
1 × $134.99
Aquascape Pro Air 20 Aeration Compressor
1 × $134.99
Subtotal: $134.99
Pond Installation as of 9/8/24 – Adding a pond to your backyard or garden can create a serene, natural escape right at home. Whether you envision a tranquil koi pond, a cascading waterfall, or a peaceful reflecting pool, pond installation can dramatically enhance your outdoor space. In this comprehensive guide, we’ll cover everything you need to know about pond installation, from planning and design to maintenance and care.
Ponds offer numerous benefits, both aesthetic and functional. Here’s why you might consider installing one:
Before diving into the installation process, careful planning is crucial to ensure your pond meets your expectations and fits well within your space. Here’s how to get started:
Once you’ve planned your pond, the next step is the installation. Here’s a general overview of the process:
Proper maintenance is key to keeping your pond healthy and attractive. Here are some tips for ongoing care:
Pond installation is a rewarding project that can enhance the beauty and tranquility of your outdoor space. By carefully planning, choosing the right materials, and following proper installation procedures, you can create a stunning pond that will be a source of enjoyment for years to come. Remember to consider ongoing maintenance to keep your pond in top condition and continue to appreciate its natural beauty.
Ready to transform your garden with a beautiful pond? Start by researching pond installation services or explore DIY options to bring your vision to life. With the right planning and care, your pond will become a cherished feature of your outdoor oasis.

Check out our store for all your water gardening needs! Aquascape products are Aquascape Inc. Certified.
Thanks for reading at Meyer Aquascapes! We hope you’ve enjoyed our post on garden pond design. Please leave a comment below if you liked it or have any questions. We’d love to hear from you! Thanks for stopping by!
If you have brown or tea-colored water, try using Activated Pond Carbon. Brown water can be caused by leaves and other debris within the vicinity of the pond. Activated Pond Carbon is designed to clear the water from the extra nutrients that are introduced to the pond through the surrounding debris and conditions. For effective results, the carbon treatment should be changed about every 2 weeks.
For green water issues, Rapid Clear, a flocculent that is 100% safe for fish, plants or wildlife, can be used. This product is a fast acting treatment that can solve cloudy water in just a few hours by physically causing the particulates floating in the water to clump together into larger particles that can be filtered out.
There are several other effective products that you can use to help clarify the water. A combination of Beneficial Bacteria, EcoBlast and SAB Stream and Pond Cleaner is the ultimate way to have perfectly balanced, clear water. The Beneficial Bacteria and SAB both help consume excess nutrients in the water, break down decaying organics and reduce sludge and odor issues. SAB also includes a powerful phosphate binder that locks up this nuisance nutrient. These two products can be used as often as once a week.
Original post from Aquascape, Inc. dated September 13, 2015.
™The IonGen™ G2 electronic water clarifier for Ponds, Pondless® Waterfalls and other decorative water features drastically reduces maintenance of string algae without the use of chemicals.
Components:
Control Panel – Touch pads allow the user to adjust the level of copper ions produced based on the condition of the water feature. A microprocessor in the Control Panel sends a signal to the Probe causing the outermost metal atoms of the Probe’s bars to lose an electron creating a positive ion. The positive ion attempts to flow from one bar to the other and is swept away by the flowing water and dispersing it into the water feature. It is recommended that the monitor panel be mounted.
The Probe – Copper/Metal bars are activated by the control panel and slowly dissolve into the water. The Probe can be installed directly in the skimmer using the Flow Chamber included with the system. Should be changed every year in the spring. If IonGen is not working check the probe as you may need to scrape the oxidation build up on the prongs or replace it if it is wore down.
Installation of the Probe – The Probe can also be installed without the flow chamber by hanging it directly into a filter with good water flow, such as the skimmer. You might like to use the IonGen G2 Probe Holder which allows installation without Flow Chamber. Straps onto any pipe from 1 to 4 inches in diameter and can be attach to the Check Valve. This allows you to have good water flow for the efficient use of the IonGen.. The Probe is replaceable and will last typically about one season, depending on usage. The Control Panel will read 00 when the Probe is completely exhausted or if there is a fault in the operation of the system.
Troubleshooting and Questions
The Importance of Understanding Alkalinity to the success of the IonGen™
Why is the ionization light flashing green? or Why can’t I raise the ionization level to full power in the panel?
This is typically related to insufficient water flow across the probe or insufficient water conductivity. Never operate the IonGen at full power when you have fish.
Solution:
1. Make sure the probe is receiving enough water flow. Try moving the probe around in the filter to increase the flow. If installed directly in the line, there will be more than enough flow.
2. Inspect the probe and remove debris or scrape away scale build up. Bluish green scale indicates insufficient water flow in the location.
Why can’t I raise the ionization level to full power?
G1 solution (panel with bars) – Make sure the red dot on the top of the probe cap is orientated in line with the direction of the water flow. This will maximize the distribution of ions into the flow of water.
Conductivity in the water may be too low – Verify you have enough flow and inspect the probe. Still have flashing light or can’t raise the ionization level, you may need to increase the conductivity of the water. Add a small quantity of Pond Salt (1/2 cup per 100 gallons) to the water. This raises the conductivity and provides the Control Panel the ability to increase the activation and release of ions. This method also will increase the rate at which the Probe exhausts.
Lower the ionization levels once desired results are achieved. This prolongs life of probe and makes sure copper level does not exceed 0.25 ppm.
Unnecessarily maintaining the IonGen at full ionization power will exhaust the probe at a faster rate and could be harmful to your fish.
Periodically test the copper level in the water to make sure it does not exceed 0.25 ppm.
Why does my water appear to be stained brown or brownish-green?
This is more than likely the result of organic debris decomposing in the water feature.
Suggestions for clearing the water:
1. Use a debris net to physically remove organic matter from the bottom of the pond.
2. Rapid Clear Flocculent clears cloudy or discolored water. Use in conjunction with Rapid Clear Fine Filter Pad.
3. SAB Stream and Pond Clean contains bacteria and enzymes to help speed up and complete the bread down of organic debris. Also incudes a powerful phosphate binder.
4. Water changes. Remember to a Pond Detoxifier when adding tap water to remove chlorine and chloramines.
Should I operate the IonGen during the Winter?
No, it is recommended to shut down the IonGen system where climates are cold in the winter. Remove the panel and store inside.

 Meyer AquascapesPond Filtration Systems
Notifications